Writing Playwright tests from scratch takes time. You find the locators, chain the actions, add assertions, and before you know it, an hour is gone for a single test. But what if you could generate most of that code automatically just by clicking through your application?
The Playwright codegen test recorder does exactly that. It watches you interact with a web page and writes the test code for you, in real time. It's built right into the Playwright VS Code extension. No extra tools needed.
Let's dive in.
What is Playwright codegen?
Playwright codegen is a built-in test generator that records your browser interactions and converts them into executable test scripts. You click buttons, fill forms, navigate pages, and codegen captures every action and translates it into proper Playwright syntax.
The recorder prioritizes user-facing locators like getByRole(), getByText(), and getByLabel() instead of brittle CSS selectors or XPath. So the generated code follows Playwright's recommended locator strategy right out of the box.
You can use codegen two ways: through the command line (npx playwright codegen) or through the VS Code extension. In this article, I'll focus on the VS Code extension because it provides a smoother workflow and lets you edit code as it's generated.
Prerequisites: setting up the Playwright VS Code extension
Before you start recording, you need the Playwright extension installed.
Open VS Code and go to the Extensions tab
Search for "Playwright"
Install the official Playwright Test for VS Code extension by Microsoft
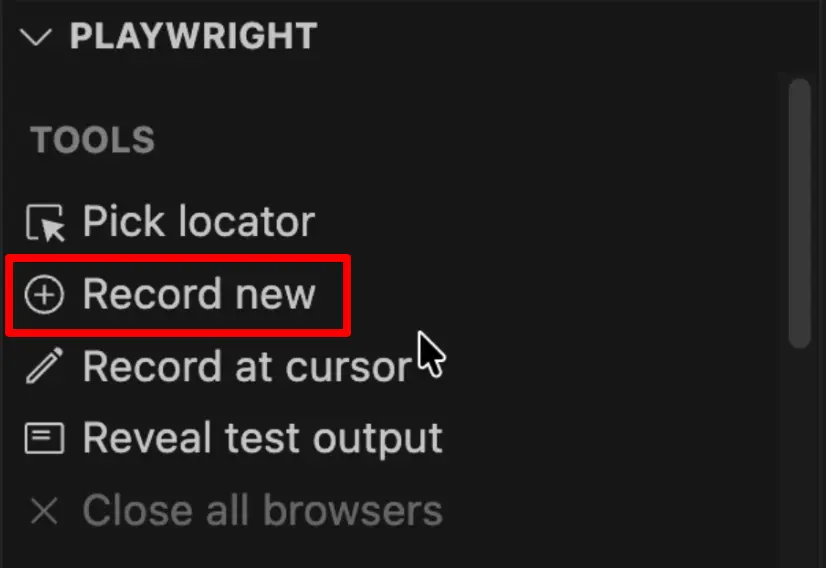
After installation, you'll see a new Test Explorer tab in the sidebar. At the bottom of the Test Explorer, there's a Playwright dropdown with a set of tools, including project selectors (Chromium, Firefox, WebKit) and the "Show Browser" toggle.
The tool we care about is the Record New button. That's your entry point to the Playwright codegen test recorder.
If you don't have Playwright installed yet, check out my guide on how to install Playwright in VS Code first.
Recording your first test with "Record New"
Click the Record New button. Two things happen:
A new spec file (
test-1.spec.ts) is created in your projectA blank Chromium browser window opens
Now just use the application like a real user would. Navigate to a URL, click buttons, fill out forms. The recorder captures everything and writes the code into your spec file in real time.
I navigated to a demo app, signed in, created an article, and deleted it. The recorder produced this:
import { test, expect } from '@playwright/test';test('test', async ({ page }) => { await page.goto('https://conduit.bondaracademy.com/'); await page.getByRole('link', { name: 'Sign in' }).click(); await page.getByRole('textbox', { name: 'Email' }).click(); await page.getByRole('textbox', { name: 'Email' }).fill('[email protected]'); await page.getByRole('textbox', { name: 'Email' }).press('Tab'); await page.getByRole('textbox', { name: 'Password' }).fill('test12345678'); await page.getByRole('button', { name: 'Sign in' }).click(); await page.getByRole('link', { name: '️ New Article' }).click(); await page.getByRole('textbox', { name: 'Article Title' }).click(); await page.getByRole('textbox', { name: 'Article Title' }).fill('Test title'); await page.getByRole('textbox', { name: 'Article Title' }).press('Tab'); await page.getByRole('textbox', { name: 'What\'s this article about?' }).fill('test description'); await page.getByRole('textbox', { name: 'What\'s this article about?' }).press('Tab'); await page.getByRole('textbox', { name: 'Write your article (in' }).fill('test body'); await page.getByRole('button', { name: 'Publish Article' }).click(); await page.getByRole('button', { name: '️ Delete Article' }).first().click(); await page.getByRole('button', { name: '️ Delete Article' }).first().click();});Notice a few things. The recorder uses getByRole() whenever possible, which is great. But it also recorded steps we don't need for automation, like clicking into input fields before filling them and pressing Tab between fields. It even recorded the "Delete Article" click twice, even though I only clicked it once.
That's normal. The recorder captures everything you do, so the raw output always needs cleanup.
Cleaning up recorded tests
This is the step most tutorials skip, and it's the most important one. Never use a recorded test as-is. Always review and clean it up.
What should you remove? Unnecessary clicks before fill(), because Playwright's fill() method automatically focuses the element. Tab key presses between fields, because you don't need them when you call fill() on the next element directly. Duplicate actions that the recorder captured twice. And overly specific locators with special characters or unusual attributes that you can simplify.
After cleanup, the test looks like this:
import { test, expect } from '@playwright/test';test('test', async ({ page }) => { await page.goto('https://conduit.bondaracademy.com/'); await page.getByRole('link', { name: 'Sign in' }).click(); await page.getByRole('textbox', { name: 'Email' }).fill('[email protected]'); await page.getByRole('textbox', { name: 'Password' }).fill('test12345678'); await page.getByRole('button', { name: 'Sign in' }).click(); await page.getByRole('link', { name: '️New Article' }).click(); await page.getByRole('textbox', { name: 'Article Title' }).fill('Test title'); await page.getByRole('textbox', { name: 'What\'s this article about?' }).fill('test description'); await page.getByRole('textbox', { name: 'Write your article (in' }).fill('test body'); await page.getByRole('button', { name: 'Publish Article' }).click(); await page.getByRole('button', { name: '️Delete Article' }).first().click();});Did you notice how compact and easier to read it is? Run it, and the test executes perfectly. That's how easy it is.
Adding steps with "Record at Cursor"
Now let's say you want to update your test. Maybe you want to add tags to the article before publishing. Do you need to re-record the entire test from scratch?
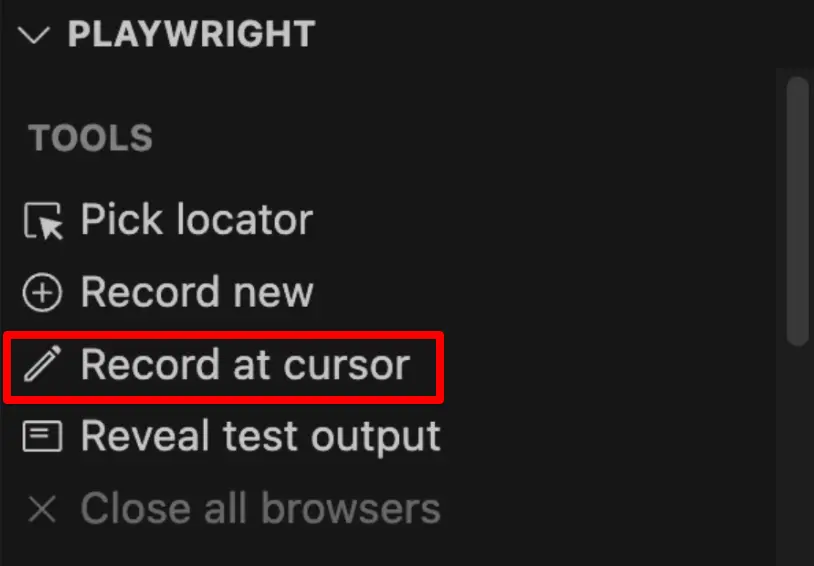
No. And this is the feature that many people don't know about: Record at Cursor.
It works like this:
Temporarily remove the steps after the point where you want to insert new actions
Place your cursor at the insertion point in the code
Run the test so the browser stops at the right state
Click Record at Cursor in the Playwright extension panel
The recorder attaches to the already-open browser instance. You continue interacting with the page, and the new actions get inserted exactly where your cursor is.
Instead of re-recording everything, you just extend your test exactly where you need it.
Adding assertions automatically
Recording actions is great, but tests without assertions aren't really testing anything. Luckily, the Playwright codegen test recorder can generate assertions too.
The workflow:
Run your test up to the point where you want to assert something
Click Record at Cursor
In the recorder popup toolbar, click the Assert Text button
Click on the element you want to assert against
The recorder generates an
expectassertion for you

I added two assertions after publishing an article, one for the title and one for the tag:
await expect(page.getByRole('heading')).toContainText('Test Title');await expect(page.locator('app-article-page')).toContainText('hello world');The recorder generates toContainText() by default, which is a partial match. That's fine as a starting point, but you should think about whether a more exact assertion like toHaveText() would be better for your case. You can learn more about Playwright assertions in this blog post.
TIP: Always review auto-generated assertions. Partial matches (
toContainText) are more forgiving but less precise. When you need to validate exact content, switch totoHaveText().
Fixing imprecise locators in generated tests
Now, the recorder doesn't always generate perfect locators. Especially for assertions.
In my example, the heading locator worked fine:
await expect(page.getByRole('heading')).toHaveText('Test Title');But the tag assertion? Problematic.
await expect(page.locator('app-article-page')).toHaveText('hello world');Why? Because app-article-page selects the entire article page section, not just the tag element. When I changed the assertion from toContainText to toHaveText, the test failed. The full text of that section is way more than just "hello world".
The fix is manual. Right-click, Inspect, find the right selector. I needed the tag-list class and the li tag inside it:
await expect(page.locator('.tag-list li')).toHaveText('hello world');Now the locator targets exactly the tag element, and the assertion passes with toHaveText().
The recorder gives you a starting point, not a finished product. Always verify that locators are specific enough for your assertions. If a locator targets a broad section of the page, narrow it down. Check out my Playwright locators best practices guide for more on writing reliable locators.
Using codegen via the command line
I recommend the VS Code extension for most workflows, but Playwright codegen also works as a standalone CLI tool. Useful when you're working outside of VS Code or want a quick recording without opening an IDE.
npx playwright codegen https://your-app-url.comThis opens the Playwright Inspector alongside a browser window. The Inspector shows the generated code in real time, just like the VS Code extension. You can select your target language (TypeScript, JavaScript, Python, Java, or C#) from a dropdown at the top.
The difference is that the CLI approach doesn't write directly into a spec file. You copy the generated code from the Inspector and paste it into your test file manually. The VS Code extension eliminates this step, which is why I prefer it for day-to-day work.
One place where the CLI shines is quick locator exploration. If you just need to find the right locator for a specific element, running npx playwright codegen and clicking around is faster than setting up a full test file.
Codegen recorder vs AI test generation
You might be wondering, why not just use AI to generate tests? Tools like Playwright MCP and AI-powered code generators are everywhere right now.
My take: the Playwright codegen test recorder is faster for generating the initial layout of your tests. It captures real browser interactions with real locators on your actual application. AI tools are guessing based on page structure, and they don't always get it right.
The recorder also has zero setup overhead. No API keys, no prompting. Just click "Record New" and go. With AI tools you spend time crafting prompts, reviewing generated code that doesn't match your actual application state, and wondering why the locator it picked doesn't even exist on the page.
Both approaches give you a draft that needs review and cleanup. The recorder just gets you there quicker for standard UI flows.
Best practices for using Playwright codegen test recorder
After using the recorder on many projects, here are the things I keep coming back to.
1. Always review and clean up after recording. Remove redundant clicks, Tab presses, and duplicate actions. The raw recording is a draft, not a finished test.
2. Verify locator accuracy. The recorder generates good locators most of the time, but not always. Pay special attention to assertion locators, they tend to be too broad.
3. Upgrade assertions when possible. The recorder defaults to toContainText(). Consider switching to toHaveText() for exact matches, but only after verifying the locator is precise enough.
4. Use "Record at Cursor" to extend tests. Don't re-record from scratch when you just need to add a few steps.
5. Refactor after recording. Once your test works, break it down into page objects, reusable functions, or fixtures. The recorder gives you the raw material. Good test architecture is your responsibility.
6. Don't record everything. The recorder works best for standard UI interactions, things like form submissions, navigation flows, and CRUD operations. For complex scenarios involving API mocking, file uploads, or multi-tab workflows, write those parts manually. Use the recorder for the repetitive UI steps and hand-code the tricky parts.
7. Keep recordings short and focused. Record one scenario at a time rather than trying to capture an entire end-to-end journey in a single session. Shorter recordings are easier to clean up.
Final Thoughts
The Playwright codegen test recorder is the fastest way to get your tests up and running. Record your scenario, clean it up, fix the locators, add proper assertions, and you have a solid test in minutes. Honestly, it's faster than using AI tools too.
Just remember, the recorder writes the first draft. You make it good.
Playwright is growing in popularity on the market very quickly and will soon be the mainstream framework for test automation. Get the new skills at Bondar Academy with the Playwright UI Testing Mastery program. Start from scratch and become an expert to increase your value on the market!
Frequently Asked Questions
What is Playwright codegen test recorder?
Playwright codegen is a built-in tool that records your browser interactions and generates test code automatically. It's available as a CLI command (npx playwright codegen) and through the VS Code extension.
How do I start recording a test in VS Code?
Install the Playwright Test for VS Code extension, open the Test Explorer sidebar, and click the "Record New" button. A browser window opens where you can interact with your application while code is generated in real time.
Can I add steps to an existing recorded test?
Yes. Use the "Record at Cursor" feature. Place your cursor where you want to insert new steps, run the test to that point, then click "Record at Cursor" to continue recording from the current browser state.
Does Playwright codegen generate assertions?
Yes. During recording, click the "Assert Text" button in the recorder toolbar, then click on the element you want to assert. The recorder generates toContainText() assertions that you can refine to toHaveText() for exact matching.
Are the generated locators reliable?
Most of the time, yes. The recorder prioritizes getByRole() and other user-facing locators. But always review them, especially for assertions, because they can target overly broad sections of the page.
Is Playwright codegen better than AI test generation?
For the initial test layout, the recorder is faster and more accurate because it captures real interactions with real locators. AI tools have their place, but the recorder gives you a more reliable starting point for UI tests.